For most businesses, re-branding means changing domain names. In some cases, the business name won’t change but the domain will need to. An example of the latter might be if your domain name example.net is changing to example.com. The company name remains the same but the domain name changes. You might even change from HTTP to HTTPS, which in Google’s eyes, is a new domain.
If you want to change your WordPress domain site URL and keep your site's SEO and rankings, there are a few steps in the process. Success depends on not skipping steps and using a hosting provider that doesn't get in your way.
If you've already found the perfect domain name and you’re ready to change your WordPress website, let’s get into it. If not, and you're looking for a high-quality domain name, Odys provides a range of high-quality, aged domain names. Get $100 credit with Odys here.
So how to go about changing your domain name URL without affecting our ranking and traffic? Here's a checklist you can follow to make the change from old domain name to new domain name on WordPress.
Copy The Old Website To The New Website Location
The first thing to do is to create the new site, get it running nice and fast, and make sure there are no broken links, spelling errors, or missing ALT tags.
The beauty of WordPress is that the entire WordPress site file structure (apart from the database) can be moved from one location to another or copied.
There are several ways to make this change but the following method is the safest. If your website is already receiving traffic, you won’t want to lose those visitors.
Step 1: Create the AddOn Domain
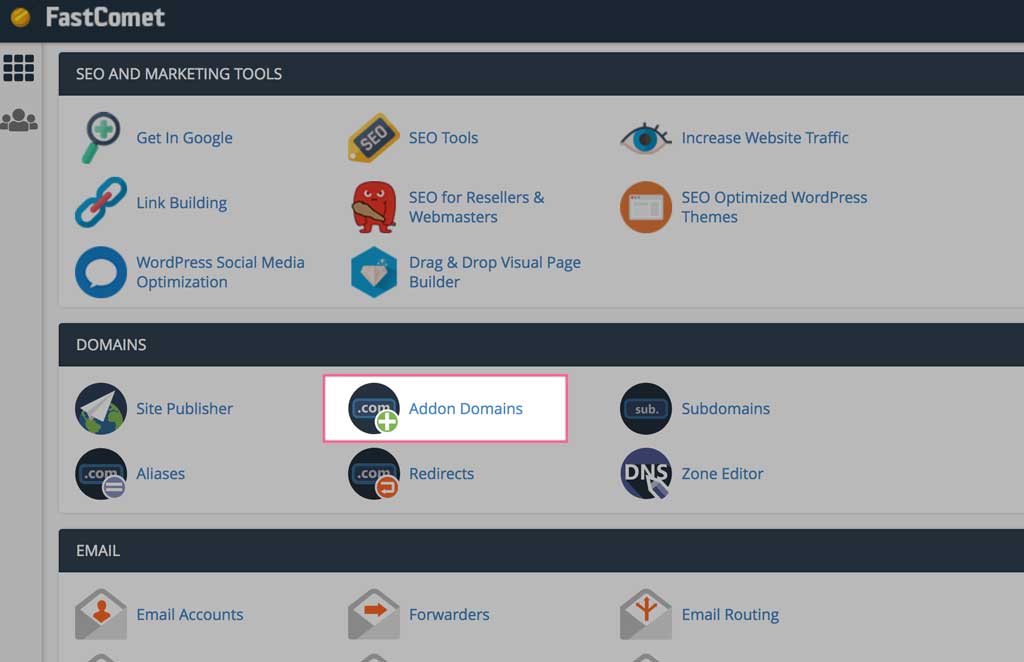
In your web hosting cPanel, create an “Addon domain”. Enter the new domain name you’ve chosen for your website.
Every cPanel is different but they share similarities in how they name the important features. Look for AddOn or Add-On Domains.
Click the Addon button and type the name of your new domain.
Return to the cPanel main area and open File Manager. Check that the folder has been created. Check under the public_html folder or the Web folder. Once you verify that the folder exists, move on to the next step
Step 2: Copy the WordPress files
Copy the files from the original website folder to the new one. (FastComet has one of the easiest to use cPanels and administration area. If you get into trouble, their support is excellent and quick to respond)
Open the original folder and select all the files and folders. A quick way to do this is to click the Select All button near the top of File Manager.
Click Copy or type Command and C (CTRL + C on Windows). That will copy all files.
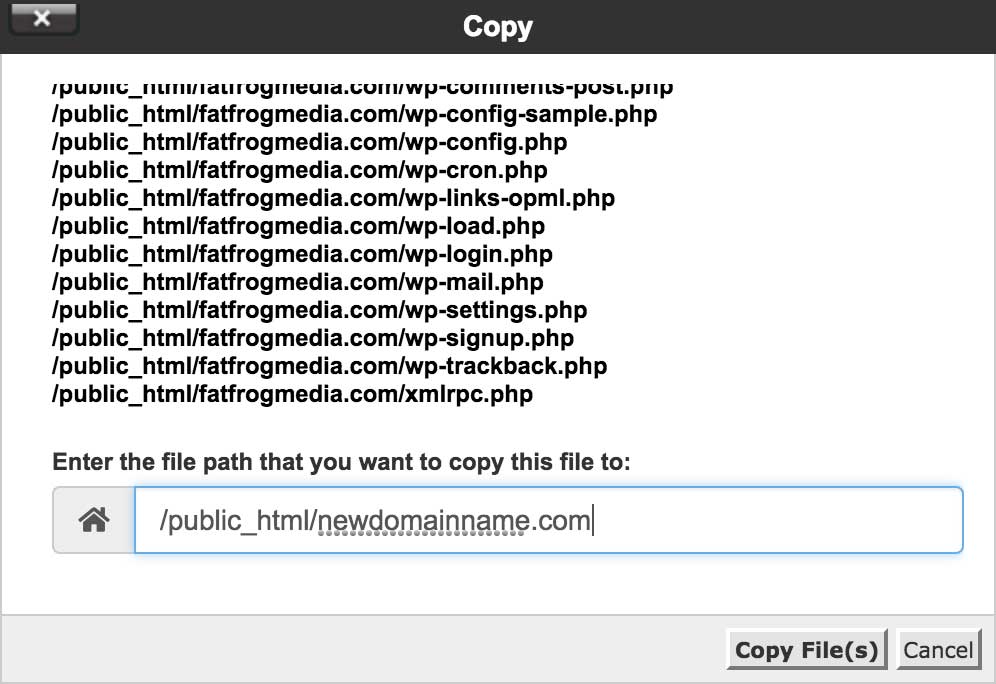
A box will pop up asking where you would like to copy the files. Change the file path to the new folder you created in step 1.
Step 3: Create a SQL database
This might sound hard but it’s pretty easy to do. We first need to make an empty database.
In Cpanel, look for the Databases section. We’ll use the MYSQL Databases section first.

- Click MYSQL Databases.
- Under Create New, type a short name for the new domain.
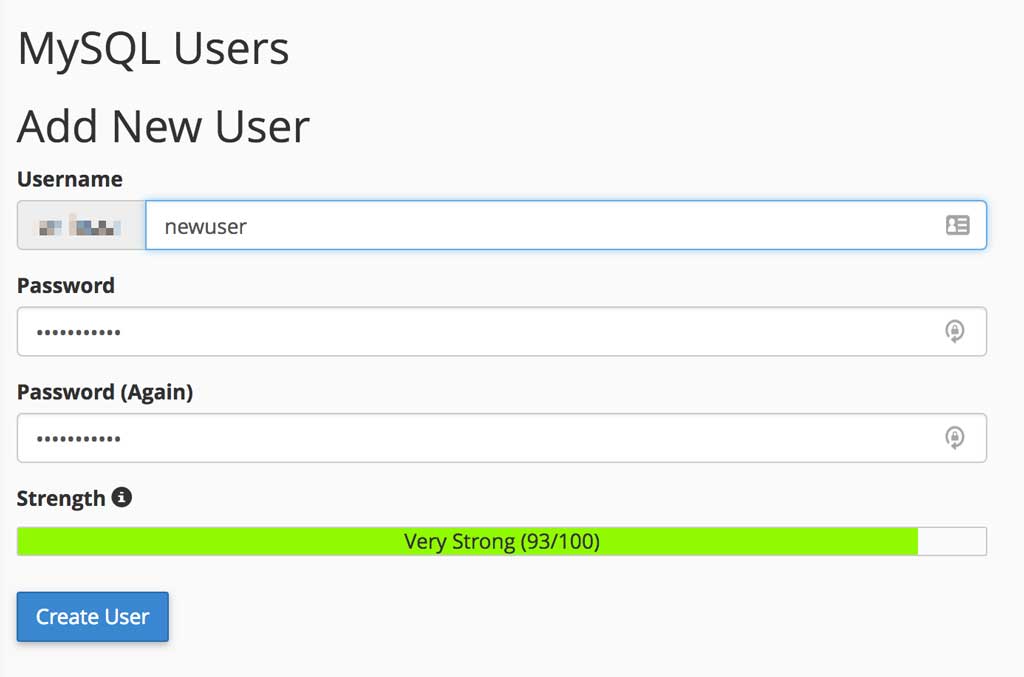
- Next, create a MySQL username. These names are arbitrary but I like to keep them fairly consistent to make identifying them easier. Make (and write down or record) a password and click Create User.
- Next, add this user.
- Under Add User to Database, select the username you created in the last step. Select the new one and click Add.
Step 4: Copy the old database into the new one
Now we need to copy the contents of the original website database into the new (empty) onefor the designated domain.
Return to Cpanel and look for phpMyAdmin. Click to open.
PhpMyAdmin is a simple tool that lets you manipulate SQL databases, where the actual data (posts, comments, etc) of your website are stored.
Find the original files
Expert Tip:
If you’re not sure what the name of the database is, you can find it by looking inside the wpconfig.php file. In a separate tab, open File Manager and navigate to the original website folder. Scroll down until you find wp-config.php. This is a very important WordPress file.
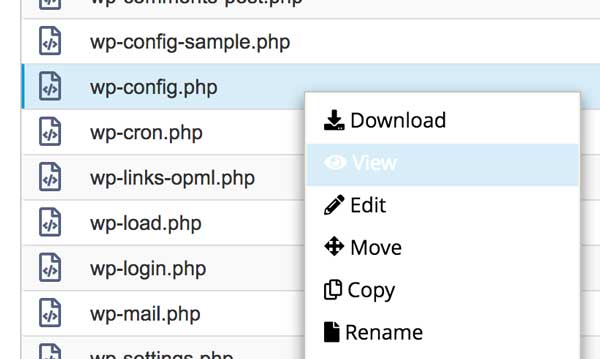
Right-click the file and select View.
The file will open in read-only mode (so you can’t accidentally change it).
Look for the line /** The name of the database for WordPress */
The following line reveals the name of the database. It will look something like this.
define('DB_NAME', ‘cpanelname_wp391');
Note this part cpanelname_wp391
Head back to phpMyAdmin and look for this database (DB) name in the list of databases on the left-hand side. Click to open.
Select Export from the top bar. Leave the Export Method as Quick and click the Go button.
A download window will open. Save the .sql file somewhere on your computer.
Next, click the name of the new DB on the left-hand side.
We will now import the information into the empty shell. Click Import from the menu bar at the top. Select the .sql file you just downloaded and let phpMyAdmin import the DB.
Step 5: Edit the domain name in mySQL
Expand the database folder structure and look for the entry that includes _options in the title. Click this entry.
The right-hand panel will now show something like this.
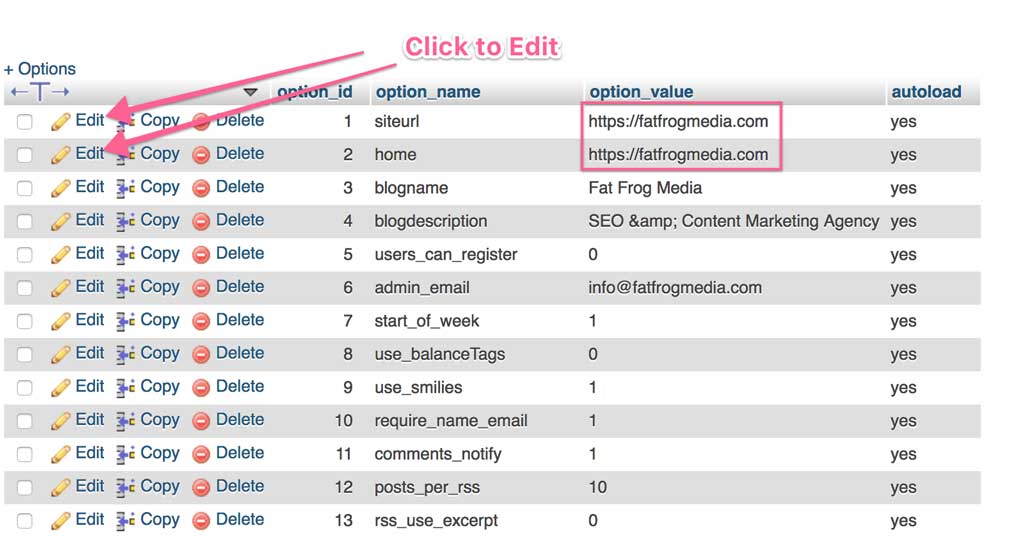
You need to change first two entries: home and siteurl.
Click each entry to edit and change the WordPress address URL.
Note: Another option is to edit the domain name directly in the WordPress dashboard under General Settings. If you can access the site (after moving), this is a simpler option but it's not always possible.
Click Settings > General
Edit the WordPress Domain Name Address (URL) and the Site Address (URL) in the WordPress Admin area.
The first box is the place where the WP installation lives on your hosting provider. The second box takes the name you display to the world. You can keep both address URLs the same or put the WordPress installation in a subfolder on your hosting. But make sure the Site Address URL is your root domain (sitename.com) and nothing more.

Step 6: Edit the domain name in wp-config.php
Head back to File Manager but this time open the folder for the new website.
Find the wp-config.php file and this time edit the WP Config content rather than just view it.
You will need to edit the three following lines of code in this file.
define('DB_NAME', ‘original_db_name’);
define('DB_USER', 'original_db_user’);
define('DB_PASSWORD', 'original_user_password’);
Where it shows your original DB name (shown as original_db_name in the example above), change to the new DB name. Do the same for the username and password.
Save changes to the WP config PHP file.
At this point the site should be ready to view.
Check the Updated Website
If you’ve set up the name servers with your registrar to point to the web hosting, then the site should resolve. Open a web browser tab and enter the new domain name. You'll want to browse as much of the site as you can to verify it's working ok.
The final step can be a tedious one but fortunately, there are ways to speed it up. The updated site will still contain links to images and pages in your old website. You will need to fix this. Here are two ways to how to do it:
- Open up every blog post and page on the site and edit the URLs manually. If it’s a small website, this is the best option.
- Use a WordPress plugin like Search & Replace to change every incidence of old URLs with the new URLs.
Create URL Mapping
Once the website is ready and you’ve checked that all links and problems are ironed out, you need to let Google know about the domain name change.
There are two main steps in this process
- Create a redirect map for all the old site address URLs to the new URLs.
- Use Google’s Change of Address tool in Google Search Console to prevent any loss of SEO juice.
For part one, use a tool like Screaming Frog SEO Spider or Website Auditor to download a list of every site address URL on your original website. Create a list of pages on the website and export them to excel.
Open Excel and copy this list to an excel column.
Add a column with the text “Redirect 301” before this column.
In a new worksheet, copy the list and replace the old name with the new one. Use Excel’s Replace All option.
Copy this list to the first sheet in the third column.
It should look something like this:

Now you’ve got a 301 redirect mapping ready to implement.
Navigate to the original domain name’s folder in Cpanel and find the .htaccess file. Open the file for editing.
Paste the excel cells at the start of this file and save the file.
Test out the redirections. Open a web browser and go to any page on your original site. You should be redirected to the new domain automatically. If not, there’s something wrong with the mapping.
Inform Google Of The Change Of Address
The final task is to let Google know about the website change.
But first we need to add the new domain to Google Search Console (GSC)
- Open GSC and click Add A Property.
- Create a new website domain as you would with any new GSC property. Verify the property.
- Next, open the property for the original website and click the cogwheel near the top right of the GSC interface. Select “change of address”.
- Pick the new domain from the list.
- Check the 301 redirects are working.
- Check the verification methods on the original site are still working.
- Click Submit to start the change of address process.
Congratulations, you’ve changed your WordPress website name URL. You now have a website working with your new domain name and a full backup of the original site in case of problems.


Hello, thanks for the useful sharing. Unfortunately I saw this post after changing everything.
When changing my domain name, I edited the old database instead of creating a new database. There does not seem to be a problem for now and everything is fine. But I’m a little confused. Will I have problems in the future as I am editing the old one without adding a new database?
Thanks in advance for your return.